How to install and configure a MediaWiki
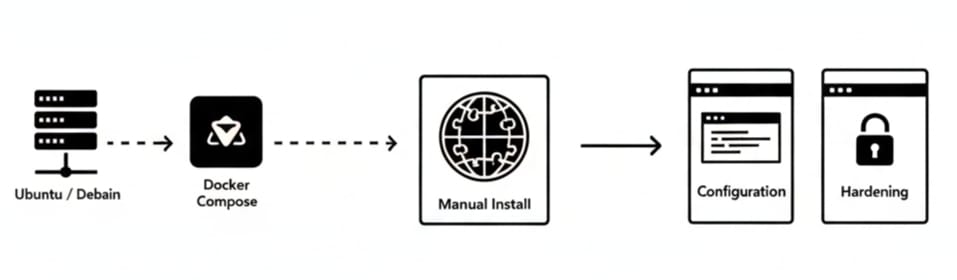
A practical, copy-and-paste friendly guide that covers a simple manual install (Ubuntu / Debian), a quick Docker Compose option, and the essential post-install configuration and hardening steps.
How to install and configure a MediaWiki
A practical, copy-and-paste friendly guide that covers a simple manual install (Ubuntu / Debian), a quick Docker Compose option, and the essential post-install configuration and hardening steps.
Notes before you startReplace placeholder values (YOUR_PASSWORD,example.com,wikidb, etc.) with values for your environment.Check the official MediaWiki release page for the latest stable/LTS version when downloading a tarball or choosing an image tag.This guide focuses on a small production-capable setup; adapt for your distro and scale.
1. Prerequisites
- A server (Linux) or local machine. Example commands use Ubuntu/Debian; adjust for other distros.
- Root/sudo privileges.
- A web server (Apache or Nginx), PHP (compatible version), and a database (MariaDB/MySQL or PostgreSQL).
- Basic firewall and DNS configured so
example.compoints at your server.
Common packages you will need (Ubuntu example):
sudo apt update
sudo apt install -y apache2 mariadb-server php php-mysql php-xml php-intl php-mbstring php-gd php-curl php-json php-zip unzip wget
You may also want composer if you plan to manage MediaWiki extensions via Composer.
2. Create the database and user
Create a dedicated database and user for MediaWiki:
sudo mysql -e "CREATE DATABASE wikidb CHARACTER SET utf8mb4 COLLATE utf8mb4_unicode_ci;"
sudo mysql -e "CREATE USER 'wikiuser'@'localhost' IDENTIFIED BY 'YOUR_PASSWORD';"
sudo mysql -e "GRANT ALL PRIVILEGES ON wikidb.* TO 'wikiuser'@'localhost'; FLUSH PRIVILEGES;"
(If your mysql root access uses a password, login with mysql -u root -p and run the SQL commands there.)
3. Download and unpack MediaWiki
Download the stable release you want. Example (replace with the version you choose):
cd /tmp
wget https://releases.wikimedia.org/mediawiki/1.39/mediawiki-1.39.6.tar.gz
tar -xzf mediawiki-*.tar.gz
sudo mv mediawiki-*/ /var/www/mediawiki
sudo chown -R www-data:www-data /var/www/mediawiki
sudo chmod -R 755 /var/www/mediawiki
For development or extension management, consider Git or Composer flows instead.
4. Configure your web server
Apache (example virtual host)
Create /etc/apache2/sites-available/mediawiki.conf with something like:
<VirtualHost *:80>
    ServerName example.com
    DocumentRoot /var/www/mediawiki

    <Directory /var/www/mediawiki>
        Require all granted
        AllowOverride All
    </Directory>

    ErrorLog ${APACHE_LOG_DIR}/mediawiki_error.log
    CustomLog ${APACHE_LOG_DIR}/mediawiki_access.log combined
</VirtualHost>
Enable the site and rewrite module:
sudo a2ensite mediawiki
sudo a2enmod rewrite
sudo systemctl reload apache2
For Nginx, use an equivalent server block pointing to /var/www/mediawiki and pass PHP to php-fpm.
5. Run the web installer
Open a browser and visit:
http://example.com/mw-config/
Follow the interactive installer:
- Provide DB host (
localhost), DB namewikidb, DB userwikiuserand password. - Create an initial admin account and site name.
- Download the generated
LocalSettings.phpand place it into/var/www/mediawiki/.
If you prefer CLI, MediaWiki ships maintenance scripts and non-interactive install options (see maintenance/install.php in the docs).
6. Files, uploads, and permissions
Ensure the images directory is writable by the webserver:
sudo chown -R www-data:www-data /var/www/mediawiki/images
sudo chmod -R 755 /var/www/mediawiki/images
If using SELinux:
sudo chcon -R -t httpd_sys_rw_content_t /var/www/mediawiki/images
Also ensure LocalSettings.php is readable by the web process but not world-writable.
7. Useful LocalSettings.php tweaks
LocalSettings.php is generated by the installer. Example additions:
$wgServer = "https://example.com";
$wgScriptPath = "";
$wgSitename = "My Wiki";
$wgEnableUploads = true;
$wgFileExtensions = [ 'png', 'gif', 'jpg', 'jpeg', 'svg', 'pdf' ];

# Security / permission tweaks
$wgGroupPermissions['*']['createaccount'] = true;   # or false to restrict
$wgGroupPermissions['*']['upload'] = false;         # disable anonymous uploads

# Email (for password reset/notifications)
$wgEnableEmail = true;
$wgEnableUserEmail = true;
$wgEmergencyContact = "admin@example.com";
$wgPasswordSender = "wiki@example.com";
For caching, search backends, or more advanced config, follow extension docs and MediaWiki manuals.
8. Recommended post-install steps
- HTTPS: Install Certbot (Let's Encrypt) and redirect HTTP → HTTPS.
- Backups: Backup
LocalSettings.php, theimages/directory, and the DB regularly. Example DB dump:mysqldump -u wikiuser -p wikidb > /backups/wikidb-$(date +%F).sql - Extensions: Start with VisualEditor, ParserFunctions, Cite, and moderation/anti-spam tools; install only what you need.
- Mail delivery: Configure Postfix/sendmail or external SMTP for notifications and account recovery.
- Caching & performance: Add memcached/Redis and configure
$wgMainCacheType; enable PHP-FPM and OPcache. - Search: For large wikis, use Elasticsearch + CirrusSearch (requires extra infra).
- User management: Decide on open registration vs. ConfirmAccount/approval and set up AbuseFilter or moderation tools accordingly.
9. Quick Docker Compose option (testing / demo)
A minimal docker-compose.yml to run MediaWiki + MariaDB (good for local testing):
version: '3'
services:
  db:
    image: mariadb:10.6
    environment:
      MYSQL_ROOT_PASSWORD: rootpw
      MYSQL_DATABASE: wikidb
      MYSQL_USER: wikiuser
      MYSQL_PASSWORD: wikipw
    volumes:
      - db_data:/var/lib/mysql

  mediawiki:
    image: mediawiki:latest
    ports:
      - "8080:80"
    environment:
      MEDIAWIKI_DB_TYPE: mysql
      MEDIAWIKI_DB_HOST: db
      MEDIAWIKI_DB_USER: wikiuser
      MEDIAWIKI_DB_PASSWORD: wikipw
      MEDIAWIKI_DB_NAME: wikidb
    depends_on:
      - db
    volumes:
      - ./images:/var/www/html/images

volumes:
  db_data: {}
Run it with:
docker compose up -d
Then open http://localhost:8080 to finish setup via the web installer. For production, secure secrets, use managed volumes, and put Traefik/Nginx + TLS in front.
10. Security & hardening checklist
- Use HTTPS everywhere (Let's Encrypt + redirect).
- Lock down
LocalSettings.phppermissions and server accounts. - Keep MediaWiki and extensions up to date.
- Limit admin privileges and use groups/permissions carefully.
- Harden PHP (
php.inituning, disable unused functions, enable OPcache). - Monitor logs and set up AbuseFilter, SpamRegex, ConfirmEdit/CAPTCHA as needed.
- Audit installed extensions periodically and remove unused ones.
11. Upgrading MediaWiki
- Backup everything (DB +
images/+LocalSettings.php) first. - Read upgrade notes for the target version.
- For tarball installs: unpack the new release, copy
LocalSettings.phpinto the new directory, run maintenance scripts (e.g.,php maintenance/update.php). - For Composer-managed installs: follow Composer and extension-specific instructions (
composer updateand read changelogs).
12. Troubleshooting tips
- 500 errors → check web server & PHP error logs (
/var/log/apache2/error.log,journalctl -u php-fpm). - DB connection errors → verify DB credentials, host, and that MariaDB/MySQL is running.
- File upload errors → check permissions on
images/and SELinux context. - Slow rendering → enable caching, inspect parser cache, and review heavy extensions.
13. Next steps (after install)
- Configure automated backups & monitoring.
- Install a small, well-tested set of extensions you actually need.
- Put moderation and anti-spam measures in place (AbuseFilter, ConfirmAccount, SpamRegex).
- Create onboarding docs or a help page for editors (Gadgets, VisualEditor tips).
- Maintain a staging server for testing upgrades and new extensions.